Flutter In-App Purchase Tutorial
Learn how to configure monthly and yearly subscriptions


Dave Faliskie
In this complete guide to setting up Flutter in-app purchases, you’ll learn how to configure monthly and yearly subscriptions for a Flutter app. We’ll cover how to configure subscriptions for both iOS and Android using RevenueCat.
One huge benefit of using RevenueCat is that it acts as a single source of truth for a user’s subscription status. You also don’t need to worry about validating purchases or managing servers – which can become tedious and complex.
Let’s get started!
Step 1: Setup
This tutorial uses the MagicWeather example Flutter app from the RevenueCat purchases-flutter repo. To follow along, you’ll need to clone the full repo and open the example project.
Clone the repo as follows:
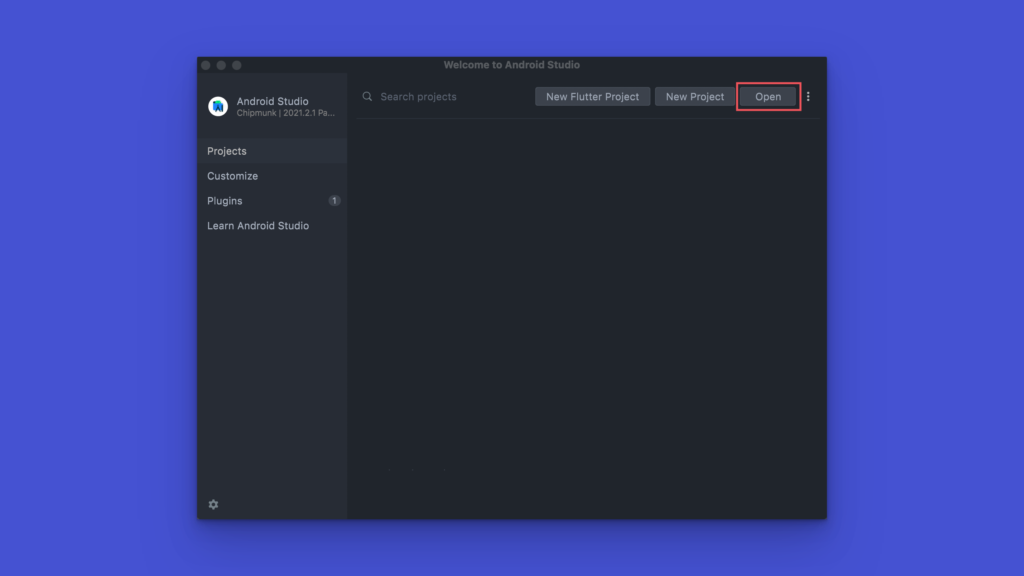
git clone git@github.com:RevenueCat/purchases-flutter.gitNext, open the project in Android Studio or VSCode; this tutorial uses Android Studio. After opening Android Studio, click on the Open button and select the purchases-flutter folder that you just created.
Note: If you haven’t already installed Flutter in your code editor, follow this guide to set up your development environment.
Open the terminal in Android Studio and run the following command:
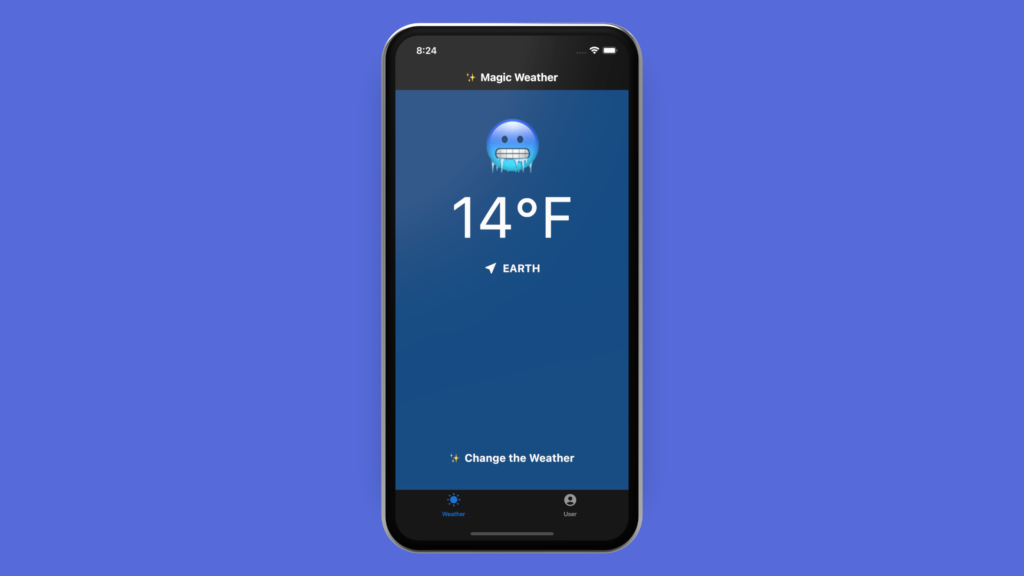
flutter pub getNow you can run the sample MagicWeather app, which will look like the image below. This tutorial will focus on in-app subscriptions for both iOS and Android, so both device types will be used to test.
Note: The MagicWeather sample app has examples for using Amazon’s Appstore, but this tutorial will focus on only the Google Play Store for Android subscriptions.
Note: The MagicWeather sample app provides a complete example of configuring subscriptions in Flutter. Step 6 below will go into more detail about creating a paywall and adding subscriptions to your app.
Step 2: Configure the Constants
There are three keys we must generate and add to our MagicWeather app: The first is a RevenueCat entitlement ID, and the other two are iOS and Android API keys. All three keys can be generated within RevenueCat.
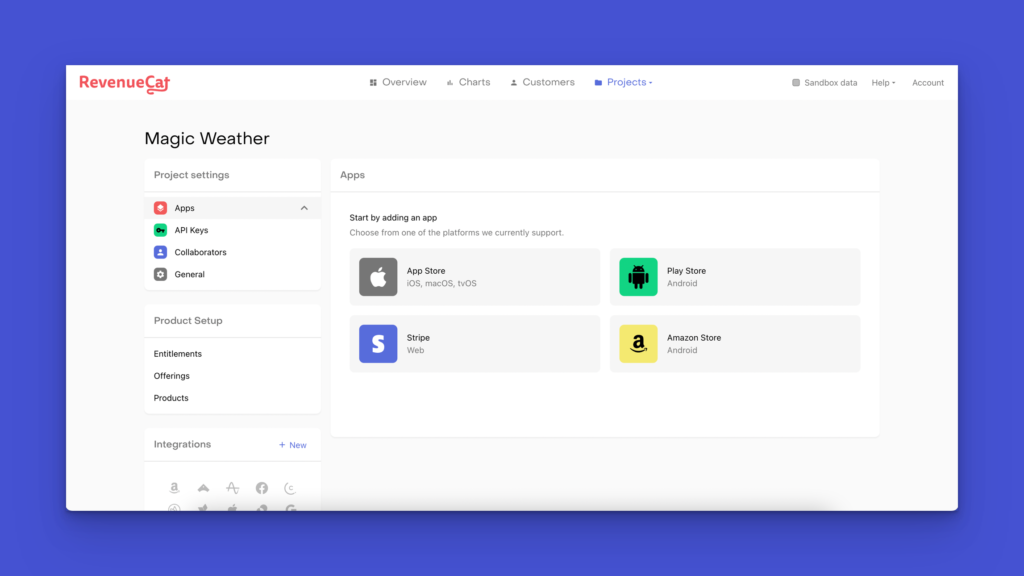
Begin by signing into your RevenueCat account and navigating to the dashboard. If you don’t already have an account, create one, and add a new project. For this example, the project is named Magic Weather.
RevenueCat Entitlement ID
An entitlement represents a level of access, features, or content to which a user is “entitled.” Create a new entitlement by clicking Entitlements on the left navigation bar under Product Setup. Then click the +New button in the top right and enter the identifier and description.
The identifier can be anything: We’ll use premium for it and Premium access to all the apps features for the description:
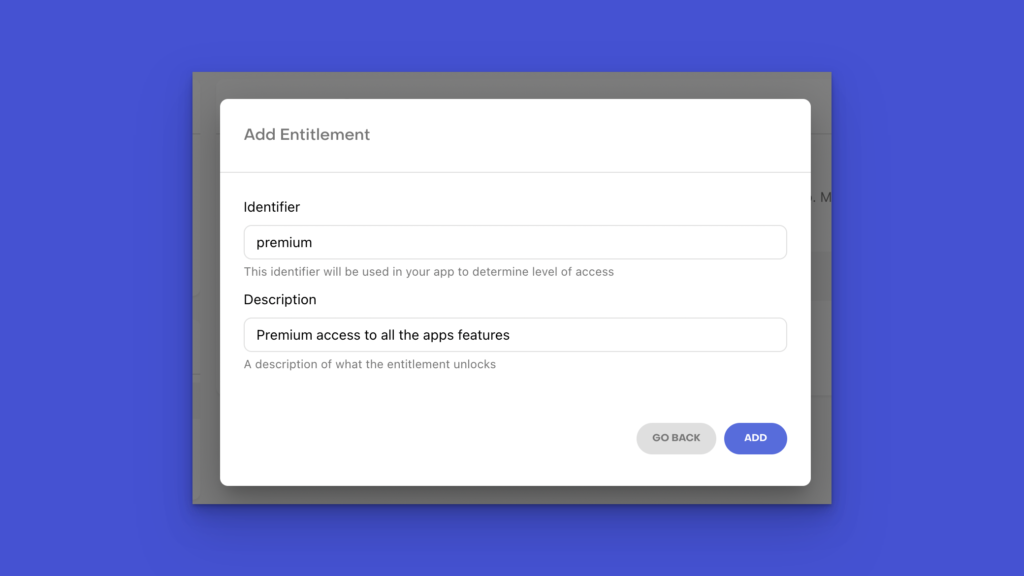
Click Add, and you should now see your entitlement listed on the entitlements page.
Back in the MagicWeather codebase, update entitlementId in the lib/src/constant.dart file to match the identifier of your new entitlement.
1const entitlementID = 'premium';App Store API Key
Begin by clicking the App Store link under the Apps tab:
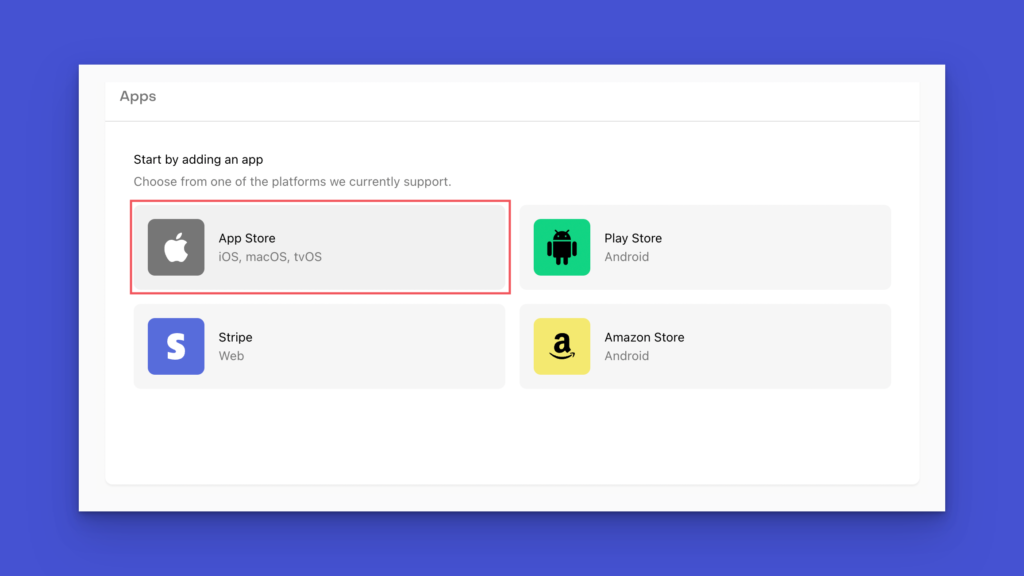
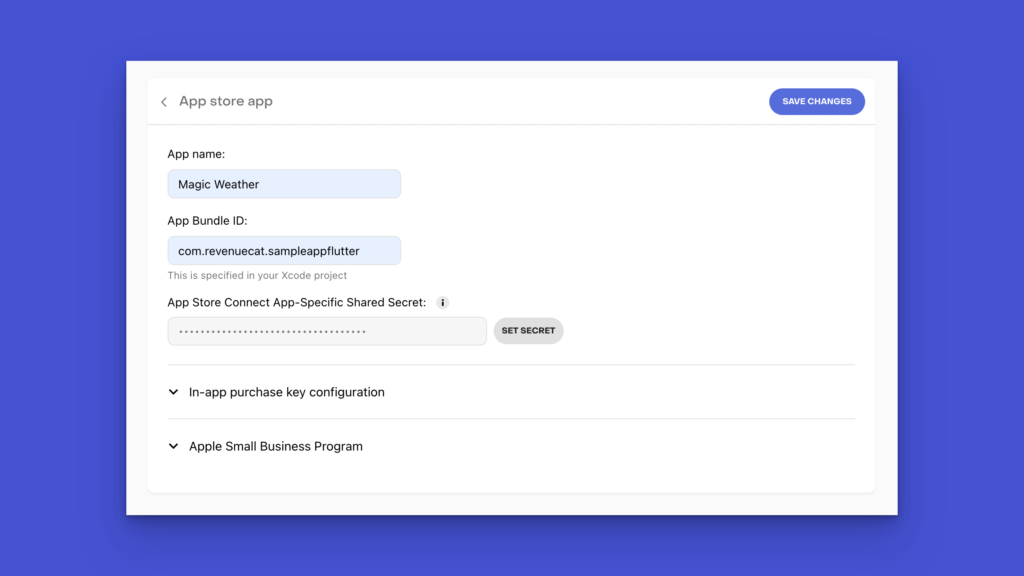
Fill in the three required fields and click Save Changes. The bundle ID can be found by opening the project in Xcode and clicking the Runner tab on the left. Under the General tab, you’ll find the Bundle Identifier. If you are using the MagicWeather sample app, you must change the bundle ID to something unique:

Follow this guide to generate the App Store Connect App-Specific Shared Secret:
Once the app is created, an API key will be automatically generated. Navigate to the API Keys section in RevenueCat and copy the new public app-specific API key for the iOS app:
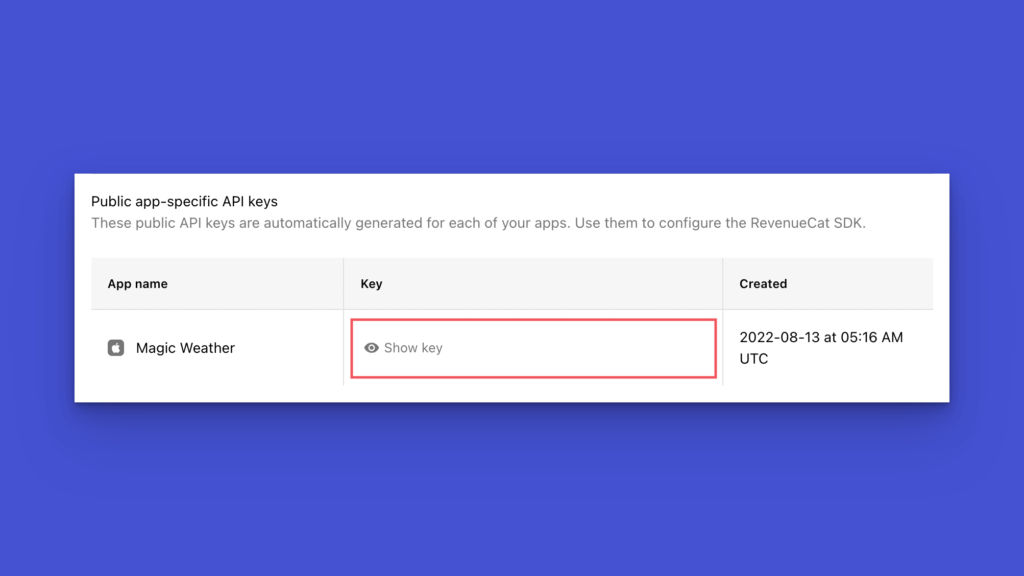
Update the appleApiKey in the lib/src/constant.dart file with the new public API key you just copied:
1const appleApiKey = 'APPLE_API_KEY';Google Play API Key
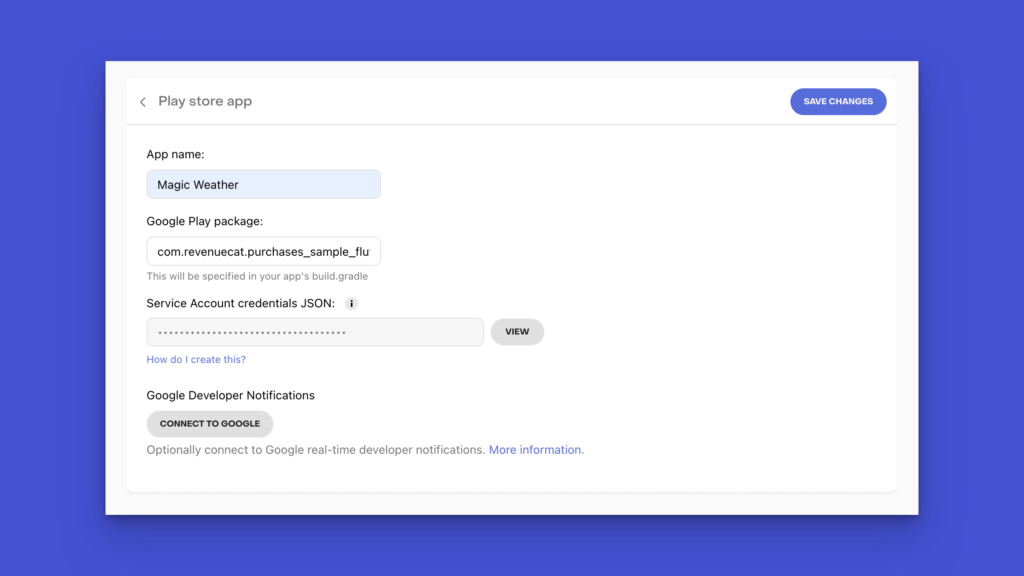
Begin by clicking the Play Store link under the Apps tab:
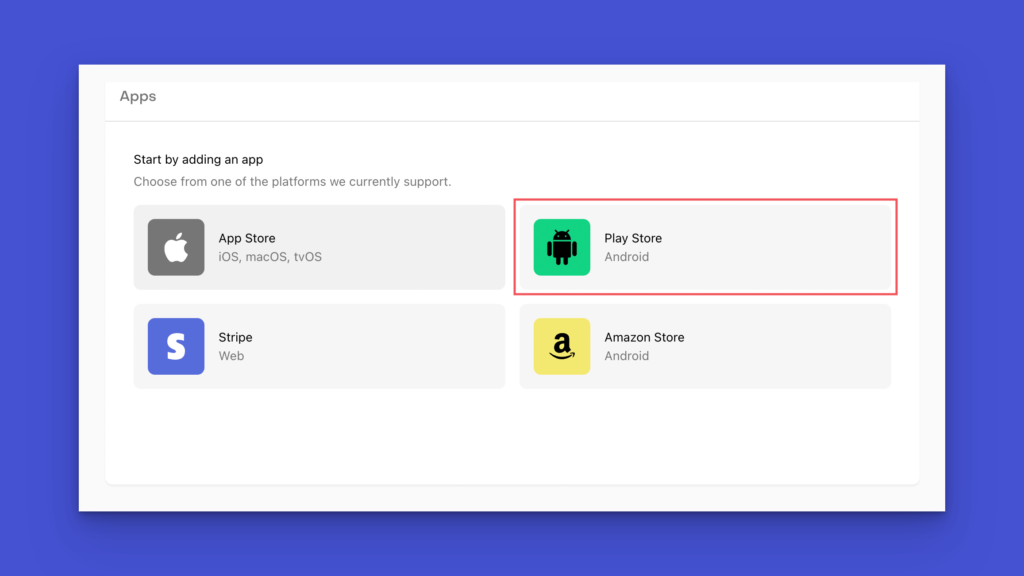
Fill in the three required fields and click Save Changes. The Google Play package can be found under the defaultConfig in the android/app/build.gradle file. If you’re using the MagicWeather sample app, you will need to change the package name to something unique. Follow this guide to generate the Service Account credentials JSON:
Once the app is created, the API key will be automatically generated. Navigate to the API Keys section and copy the new public app-specific API key for the Android app:
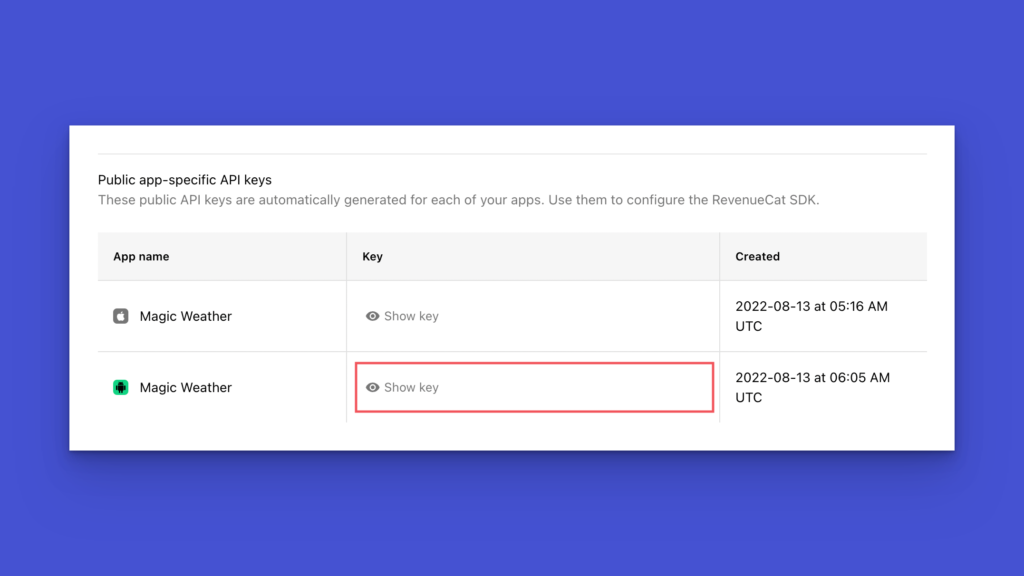
Update the googleApiKey in the lib/src/constant.dart file with the new public API key you just copied:
1const googleApiKey = 'ANDROID_API_KEY';Footer Text
The final constant you need to update in the lib/src/constant.dart file is the footerText. Learn more about what the footer text is and what you should include here. For this tutorial, set the footerText to the following:
1const footerText = """A purchase will be applied to your account upon confirmation of the amount selected. Subscriptions will automatically renew unless canceled within 24 hours of the end of the current period. You can cancel any time using your account settings. Any unused portion of a free trial will be forfeited if you purchase a subscription.""";Step 3: Set up Subscriptions
With RevenueCat, we can organize all our products in one location and then decide which products to offer within our app. For more information on how this works, check out this article.
In simple terms, we’ll add subscription products to App Store Connect and Google Play, link those products in RevenueCat, then package similar products and use them as part of an offering. The offering is what will ultimately be displayed to the user for purchase.
Set Up Products
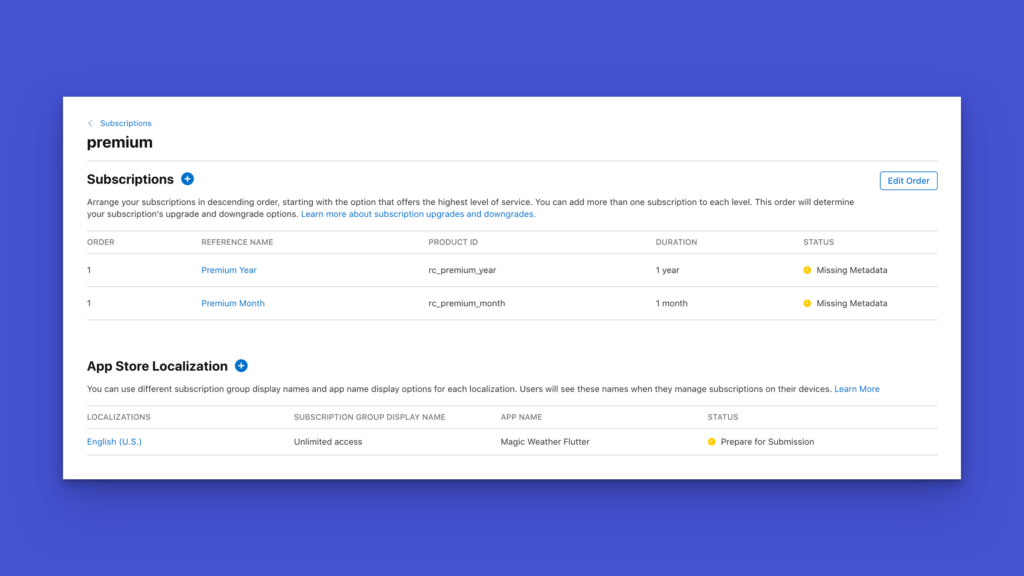
First, you’ll need to add the subscriptions to both App Store Connect and Google Play. For this example, we will add two different subscription types: one for a monthly subscription and one for a yearly subscription. Both App Store Connect and Google Play need to be configured with the two subscriptions using the information below:
- Premium Month:
- Product ID: rc_premium_month
- Price: $9.99
- Premium Year:
- Product ID: rc_premium_year
- Price: $99.99
For help setting up products in each store, check out these guides:
Note: You can finish the setup with reviewer information later; what is important now is to create the subscriptions and generate the product IDs.
After creating the products in each store, your views should look similar to this:

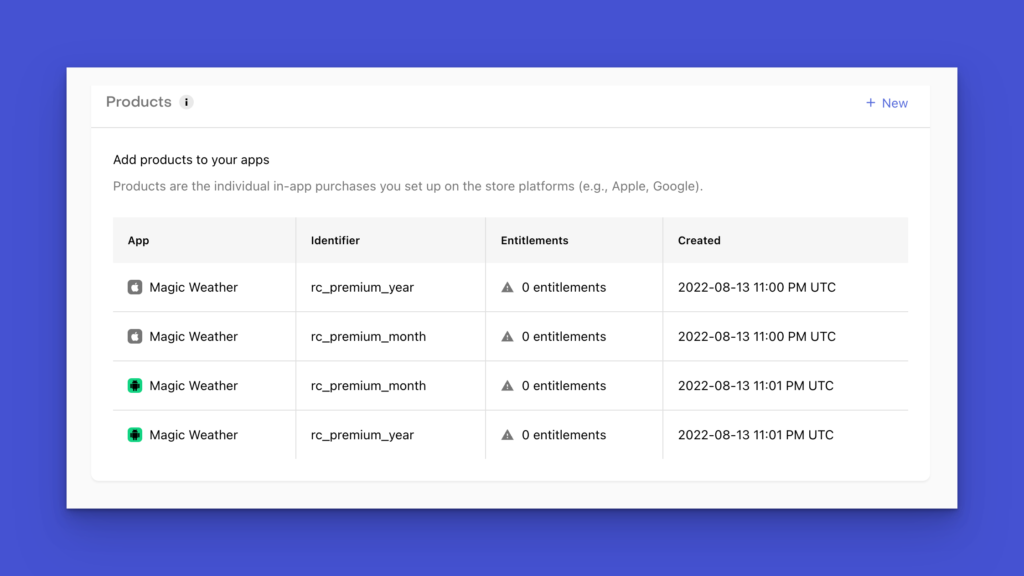
Configure Products in RevenueCat
Now that you have the products set up in the stores, you can follow this guide to add each product into your RevenueCat dashboard. After adding the products to RevenueCat, the Products tab should look similar to the following:
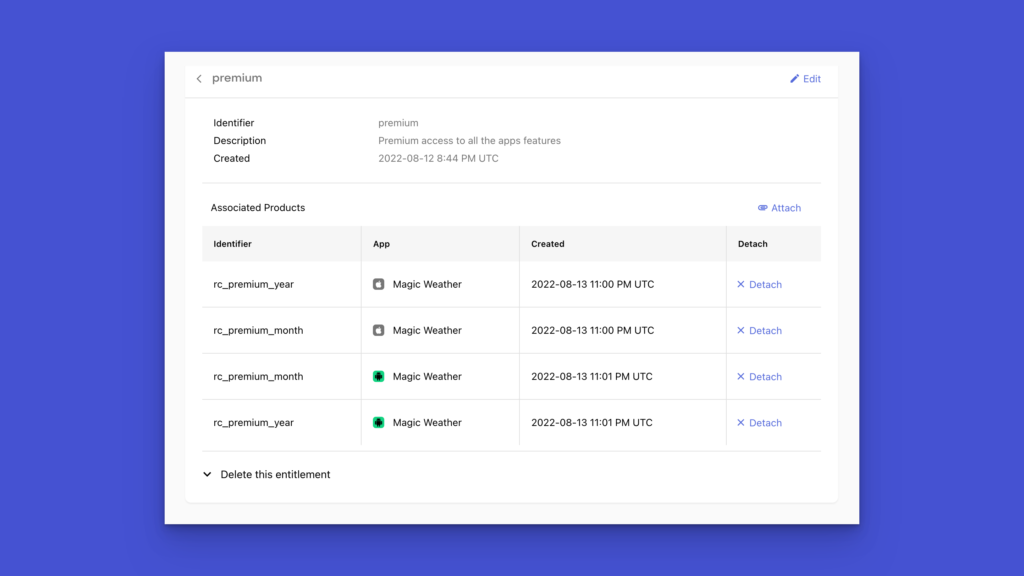
Once all the products are in RevenueCat, navigate back to the entitlement set up earlier, called premium. Find Associated Products and click Attach, then attach all four products. After doing so, the entitlement should look similar to this:
Create the Offering
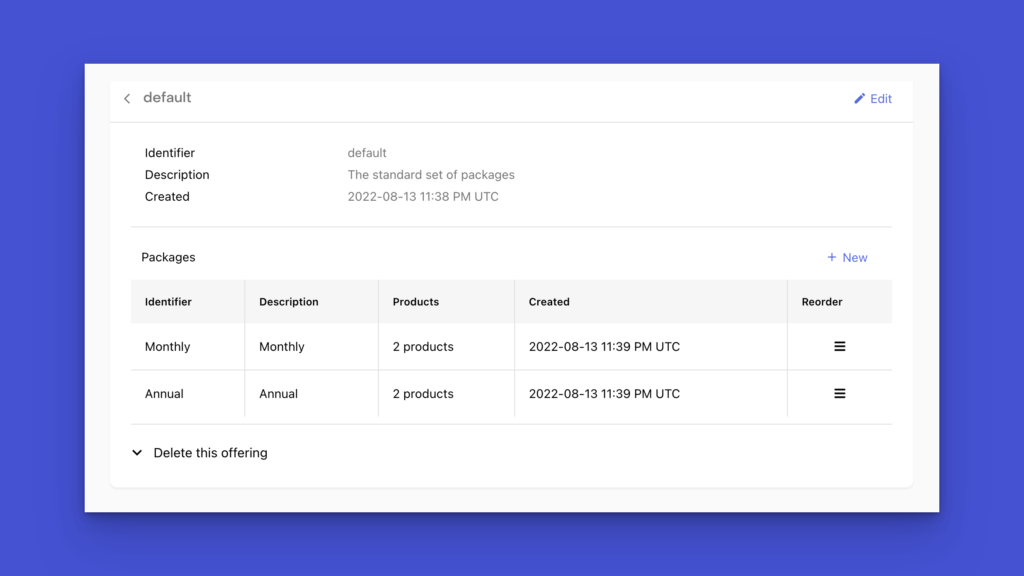
Follow this guide to create a default offering with two different packages. One package will contain the monthly subscriptions for both iOS and Android, while the second will contain the annual subscriptions. The default offering should look similar to the following:
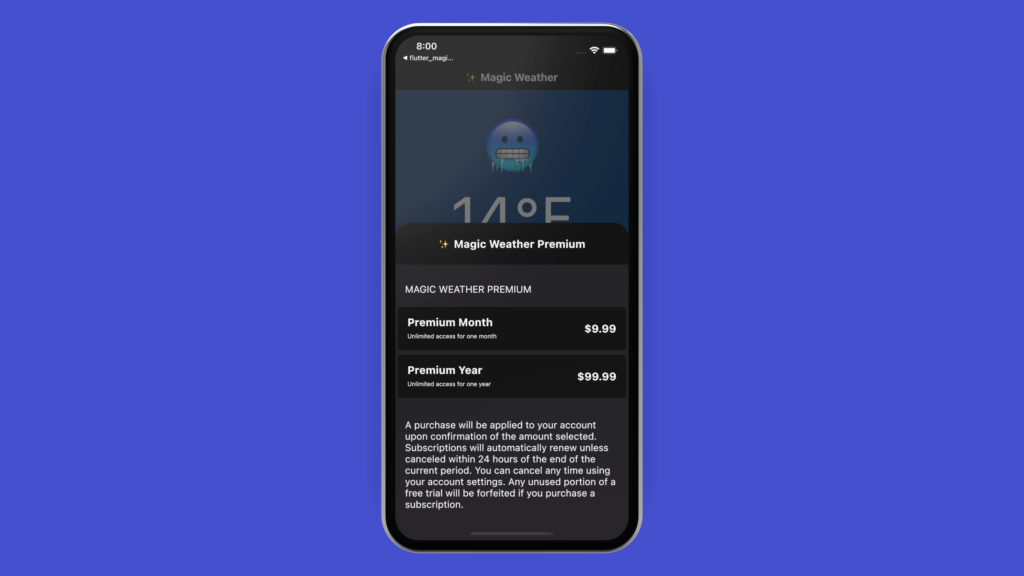
You now have everything set up in RevenueCat and both of the app stores. Go back to Android Studio and run the MagicWeather app, then click on the link Change the Weather.
You should now be presented with the paywall to upgrade to one of the premium subscriptions. Notice that the information displayed here is the same information you configured earlier.
Note: When testing on an Android emulator, you will need to log in to Google Play on the test device. If you still see errors about fetching offerings, make sure your app is on a testing track. If you have additional issues, read this.
Step 4: Testing In-App Subscriptions on Flutter
With the subscriptions now configured, we’re ready to make a test purchase. However, you must first create test accounts to make the purchase:
Note: When configuring your own app, you need to add the In-App Purchase capability in Xcode. Read this article for more details on adding capabilities to your app.
After you set up your test accounts to make sandbox purchases, click the Change the Weather button in the MagicWeather app. You should again be presented with the paywall; select the premium monthly subscription to make the purchase.
After a successful purchase, click the Change the Weather button again, and now the temperature should change to a random value.
Confirm that the purchase registered in RevenueCat by navigating to the overview dashboard and clicking the Sandbox data box in the top right. You should see that you have one active subscription:

Note: Although it is possible to test on the emulator, we recommend using a physical device.
Step 5: Renewing In-App Subscriptions on Flutter
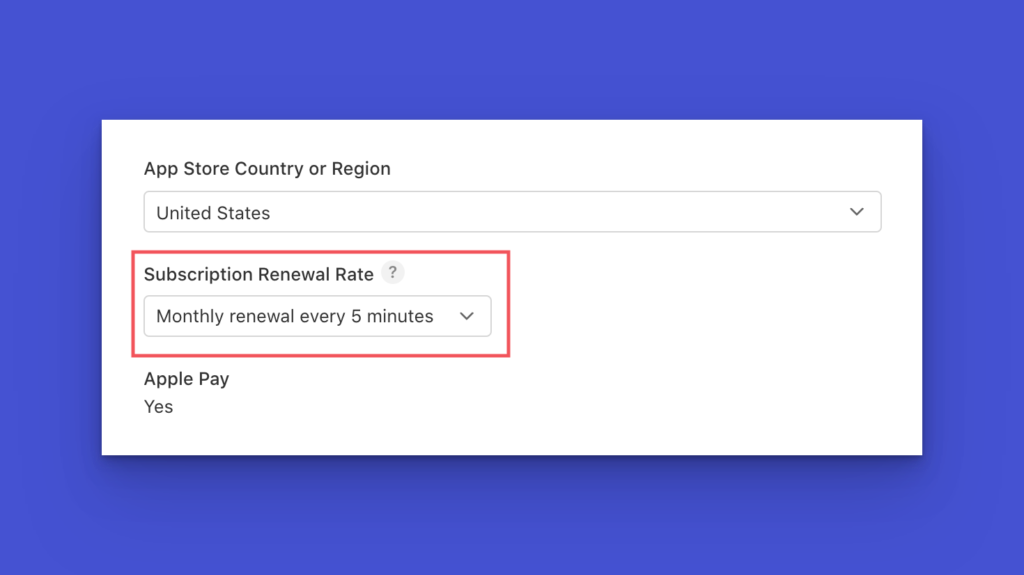
iOS
When you created your iOS test user, you may have noticed that you can choose the duration of a subscription renewal. This is great because instead of waiting a month to test if the recurring payment works, you can wait as little as 3 minutes.
In the image above you can see that the subscription expires one hour after it was purchased. However, after waiting an hour, you will see that the subscription was not auto-renewed and instead expired.
There are a few steps to get this working correctly. First, let’s update our iOS test user to auto-renew every 5 minutes. This isn’t required but will make testing faster.
Next, follow this guide to update RevenueCat to listen for updates from Apple about subscription renewals.
After configuring App Store Server Notifications to send to your RevenueCat link, view the sandbox dashboard again. All the renewals we expected before should now be synced, and you should see that the subscription is active again.
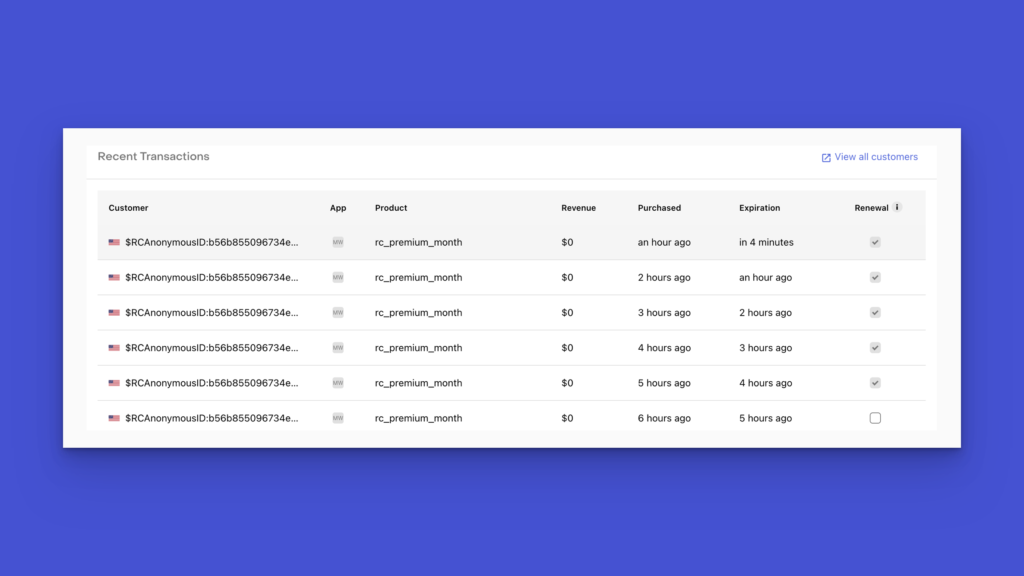
Note: The expiration duration changed because we modified our test user from one hour to 5 minutes.
Android
Like we did with iOS, we need to configure the Play Store to notify RevenueCat about subscription renewals. You’ll notice after completing a test purchase of a subscription that it will not auto-renew in the RevenueCat dashboard.
Follow this guide for complete instructions on how to notify RevenueCat about Google Play purchase events. Unlike iOS, Google Play will not retroactively apply subscription renewals in RevenueCat. If the original test subscription has already renewed five times, it will no longer keep renewing.
In that case, create a new subscription to test that auto-renewal is now working. After finishing the configuration, you should see that your original subscriptions are now auto-renewing.

Step 6: Understanding How the Sample App Works
We now have subscriptions configured and working for the MagicWeather app, which is a great example of a Flutter app that has features hidden behind a paywall. In this section, we’ll deconstruct some of the core features from the sample app and show you how to apply these same concepts in your own app.
Note: The code below was taken from the sample app and modified; for a complete picture of how everything works, check out the repo.
Setting up the Package in Your App
Install the purchases_flutter package in your app, so you have access to RevenueCat. Next, configure the app to use the package. To do this, you can copy a few files from the sample app to use within your own app.
Create the file lib/src/constant.dart and define the following constants. See Step 2: Configure the Constants for more detail on how to set the constants.
1const entitlementID = 'ENTITLEMENT_ID';
2const footerText = 'FOOTER_TEXT';
3const appleApiKey = 'APPLE_API_KEY';
4const googleApiKey = 'GOOGLE_API_KEY';
Create the file lib/store_config.dart and add the following code. This file defines the StoreConfig class, which will be used to configure either the iOS or Android store:
1import 'package:flutter/foundation.dart';
2
3enum Store { appleStore, googlePlay }
4
5class StoreConfig {
6 final Store store;
7 final String apiKey;
8 static StoreConfig _instance;
9
10 factory StoreConfig({ Store store, String apiKey}) {
11 _instance ??= StoreConfig._internal(store, apiKey);
12 return _instance;
13 }
14
15 StoreConfig._internal(this.store, this.apiKey);
16
17 static StoreConfig get instance {
18 return _instance;
19 }
20
21 static bool isForAppleStore() => _instance.store == Store.appleStore;
22
23 static bool isForGooglePlay() => _instance.store == Store.googlePlay;
24}Now open main.dart and configure the store based on the device type. Don’t forget to import store_config.dart and constant.dart.
1void main() {  // Add this if/else block to configure the correct store
2    if (Platform.isIOS) {
3        StoreConfig(
4            store: Store.appleStore,
5            apiKey: appleApiKey,
6         );
7    } else if (Platform.isAndroid) {
8          StoreConfig(
9              store: Store.googlePlay,
10              apiKey: googleApiKey,
11        );
12    }
13    runApp(const MagicWeatherFlutter());
14}
The app is now ready to use RevenueCat! MagicWeather uses a simple class to hold a few values that are specific to the current instance of the app. These values could be held in a database such as Firebase, but for this example, create a new file called lib/src/model/app_data.dart and add the following code.
1class AppData {
2    static final AppData _appData = AppData._internal();
3
4    bool entitlementIsActive = false;
5    String appUserID = '';
6
7    factory AppData() {
8        return _appData;
9    }
10    AppData._internal();
11}
12
13final appData = AppData();
Note: MagicWeather uses this class to store the current temperature displayed to the user. In most cases, you won’t need this AppData class and instead will store this information in a database.
Build Your Own Paywall
The MagicWeather sample app has just one button: When Change the Weather is clicked, if the user is subscribed to premium, the app will randomly change the temperature. Similarly, your app will probably have buttons that enable extra features if the user is subscribed. If the user isn’t subscribed, then the button should display a paywall where the user can subscribe.
Create a new file called lib/src/views/paywall.dart in here where you can build your custom paywall. The code below shows a modified version from MagicWeather. The important areas to include are the following:
- The widget is initialized with a required Offering.
- There is a ListView.builder that will display all the products in the offering.
- The footerText is displayed.
1import 'package:flutter/material.dart';
2import 'package:purchases_flutter/purchases_flutter.dart';
3import 'package:[YOUR_APP]/src/constant.dart';
4import 'package:[YOUR_APP]/src/model/singletons_data.dart';
5
6class Paywall extends StatefulWidget {
7 final Offering offering;
8
9 const Paywall({Key key, this.offering}) : super(key: key);
10
11
12 _PaywallState createState() => _PaywallState();
13}
14
15class _PaywallState extends State<Paywall> {
16
17 Widget build(BuildContext context) {
18 return SingleChildScrollView(
19 child: SafeArea(
20 child: Wrap(
21 children: <Widget>[
22 Container(
23 height: 70.0,
24 width: double.infinity,
25 decoration: const BoxDecoration(color: Colors.black),
26 child: const Center(child: Text('APP NAME'))),
27 const Padding(
28 padding:
29 EdgeInsets.only(top: 32, bottom: 16, left: 16.0, right: 16.0),
30 child: SizedBox(
31 child: Text('PREMIUM'),
32 width: double.infinity,
33 ),
34 ),
35 ListView.builder(
36 itemCount: widget.offering.availablePackages.length,
37 itemBuilder: (BuildContext context, int index) {
38 var myProductList = widget.offering.availablePackages;
39 return Card(
40 color: Colors.black,
41 child: ListTile(
42 onTap: () async {
43 try {
44 CustomerInfo customerInfo =
45 await Purchases.purchasePackage(
46 myProductList[index]);
47 appData.entitlementIsActive = customerInfo
48 .entitlements.all[entitlementID].isActive;
49 } catch (e) {
50 print(e);
51 }
52
53 setState(() {});
54 Navigator.pop(context);
55 },
56 title: Text(
57 myProductList[index].storeProduct.title,
58 ),
59 subtitle: Text(
60 myProductList[index].storeProduct.description,
61 ),
62 trailing: Text(
63 myProductList[index].storeProduct.priceString,
64 ),
65 ),
66 );
67 },
68 shrinkWrap: true,
69 physics: const ClampingScrollPhysics(),
70 ),
71 const Padding(
72 padding:
73 EdgeInsets.only(top: 32, bottom: 16, left: 16.0, right: 16.0),
74 child: SizedBox(
75 child: Text(
76 footerText,
77 ),
78 width: double.infinity,
79 ),
80 ),
81 ],
82 ),
83 ),
84 );
85 }
86}Display the Paywall Based on Subscription Status
We have now created the paywall view. Next, we can conditionally display it based on whether or not the current user is subscribed. You can get the current user’s information from RevenueCat with the line of code below.
The code should be placed in the view that contains the button that will conditionally show the premium feature or paywall to the user. View how this is used in the sample app here.
1CustomerInfo customerInfo = await Purchases.getCustomerInfo();To check whether the user has an active subscription, use the following if/else statement. Note the use of the entitlementID here: This is the value we defined in the constant.dart file earlier.
1if (customerInfo.entitlements.all[entitlementID] != null &&
2     customerInfo.entitlements.all[entitlementID].isActive == true) {
3    // User has subscription, show them the feature
4} else {
5    // Show the Paywall
6}
Remember that the paywall requires an offering, so to show the paywall, we’ll first need to grab our offerings. Add this code to the else block where we show the paywall.
1Offerings offerings;
2try {
3    offerings = await Purchases.getOfferings();
4} on PlatformException catch (e) {
5    // Error finding the offerings, handle the error.
6}
With the offerings defined, we can now call our paywall view. In this example, we’ll use a bottom sheet modal. Add the code below defining the offerings.
Notice that we pass offerings.current to the paywall; you can create several offerings in the RevenueCat dashboard, but only one will be marked current. This is very useful because you can change your offering in RevenueCat and your app will update without the need to redeploy.
1if (offerings == null || offerings.current == null) {
2    // offerings are empty, show a message to your user
3} else {
4    // current offering is available, show paywall
5    await showModalBottomSheet(
6      useRootNavigator: true,
7      isDismissible: true,
8      isScrollControlled: true,
9      backgroundColor: Colors.black,
10      shape: const RoundedRectangleBorder(
11        borderRadius: BorderRadius.vertical(top: Radius.circular(25.0)),
12      ),
13     context: context,
14     builder: (BuildContext context) {
15          return StatefulBuilder(
16              builder: (BuildContext context, StateSetter setModalState) {
17                  return Paywall(
18                      offering: offerings.current,
19                  );
20               });
21          },
22      );
23}
You now know how to set up a subscription paywall within your app. This example has only one premium feature, but you could easily add the same conditional logic to multiple areas of your app.
Since we haven’t hardcoded any subscription or product IDs, it’s easy to modify what the entitlementID gives access to. If your app is more complex, you could have several entitlementIDs that give access to different features.
Restoring Purchases
It’s necessary to allow users to restore their purchases somewhere in your app. RevenueCat makes this extremely simple: The code below will add a “Restore Purchases” button. You will need to include the purchases_flutter package in the file for this to work.
1TextButton(
2    onPressed: () async {
3        await Purchases.restorePurchases();
4     },
5    child: Text("Restore Purchases"),
6)
Final Thoughts
You now have subscriptions set up in your Flutter app that will work for both iOS and Android. RevenueCat will handle the complex validation of purchases and give you one source of truth for a user’s subscription status.
This tutorial covered a lot, but there are also several other RevenueCat features you can take advantage of. Check out the full documentation to learn more. When you’re ready to deploy, follow the steps in the launch checklist to make sure everything is complete and ready to go.
In-App Subscriptions Made Easy
See why thousands of the world's tops apps use RevenueCat to power in-app purchases, analyze subscription data, and grow revenue on iOS, Android, and the web.