Send a subscription cancelation email to app users
Email users a customized feedback survey when they unsubscribe from a free trial.


Ryan Kotzebue
Collecting data from users that cancel during a trial is critical for improving conversion rates and the overall trial experience of your app.
In this tutorial, we’re going to use Subscriber Attributes and Zapier to email users a customized feedback survey when they unsubscribe from a free trial — no server code required!
Save email as an attribute
The first thing we’ll do is collect the user email addresses from inside our app. If your app uses email for authentication, this is an excellent time to start capturing it in RevenueCat.
1// 1.
2Purchases.shared.setEmail(emailField.text)
To save a user’s email, we use the setEmail helper on the shared Purchases instance to save it as an attribute. You can view all of the reserved attributes in the RevenueCat docs.
If your app doesn’t collect emails, you can build a similar flow using phone numbers or push notifications.
Save custom attributes
To improve the deliverability and open rates of the emails, we’re going to add personalization to the email subject. Our fictitious app captures the user’s favorite workout during onboarding, so we’ll add this attribute as well.
1// 2.
2Purchases.shared.setAttributes(["favorite_workout" : "cycling"])
Set up Zapier to capture unsubscribes
We will use Zapier to listen to subscription status changes from RevenueCat. Zapier is an excellent no-code tool for stitching together workflows between apps, and the rest of this tutorial assumes some basic familiarity with it.
1. Set up new “Zap” with webhook trigger
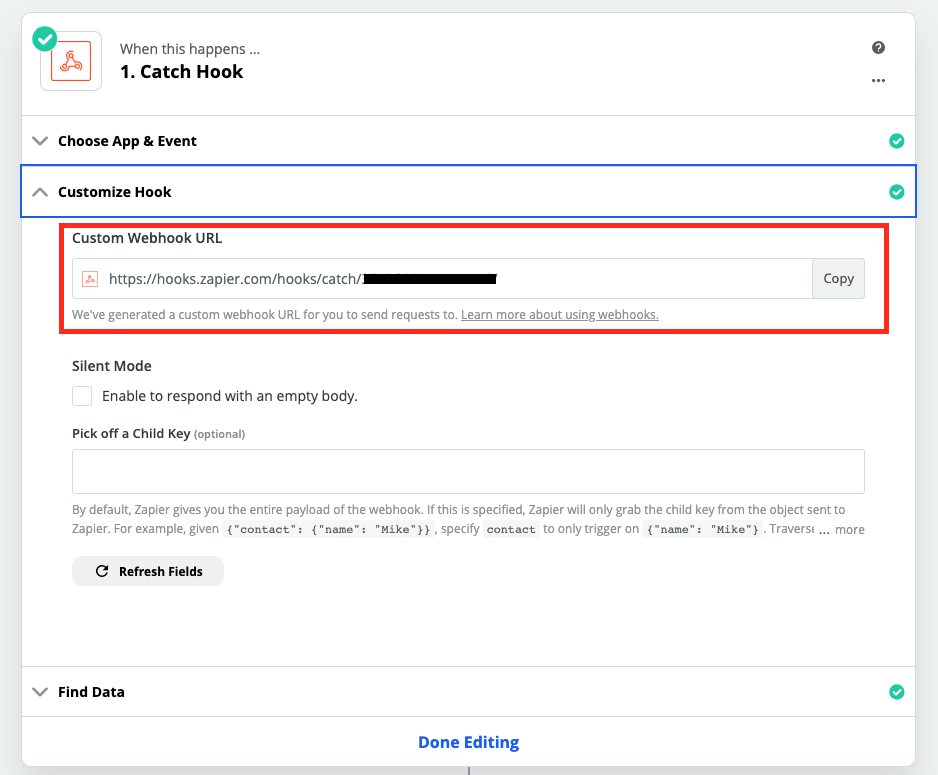
Create a new Zap and select Webhooks by Zapier with Catch Hook as the trigger event. The Zap will trigger the automation whenever a webhook is received.

When you set up the webhook trigger, Zapier will provide a Custom Webhook URL that you will point RevenueCat events to. To do that, copy the URL provided in Zapier, and head over to RevenueCat.
2. Add webhook URL in the RevenueCat dashboard
In the RevenueCat dashboard, paste in the Webhook URL that you copied from Zapier. The Authorization header value is optional – for simplicity’s sake, we won’t be using it in this tutorial.
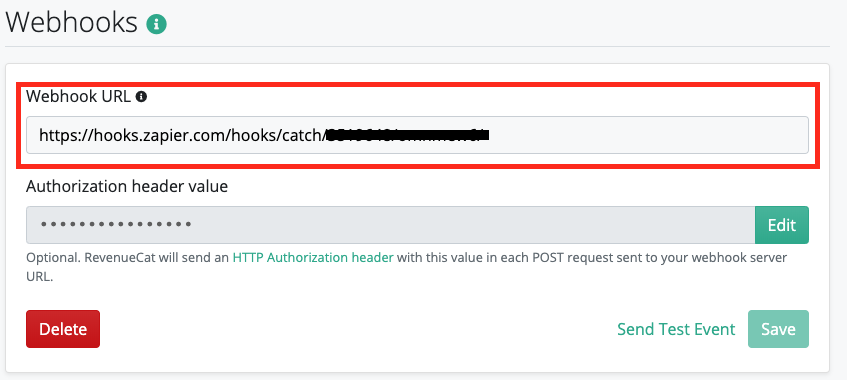
Once you add the webhook URL, you can click Send Test Event to make sure Zapier is receiving the events.
3. Filter events
Now that you have the webhook URL set up, all subscription status events will start being delivered into Zapier immediately. However, for this automation, we are only interested in trial cancellations.
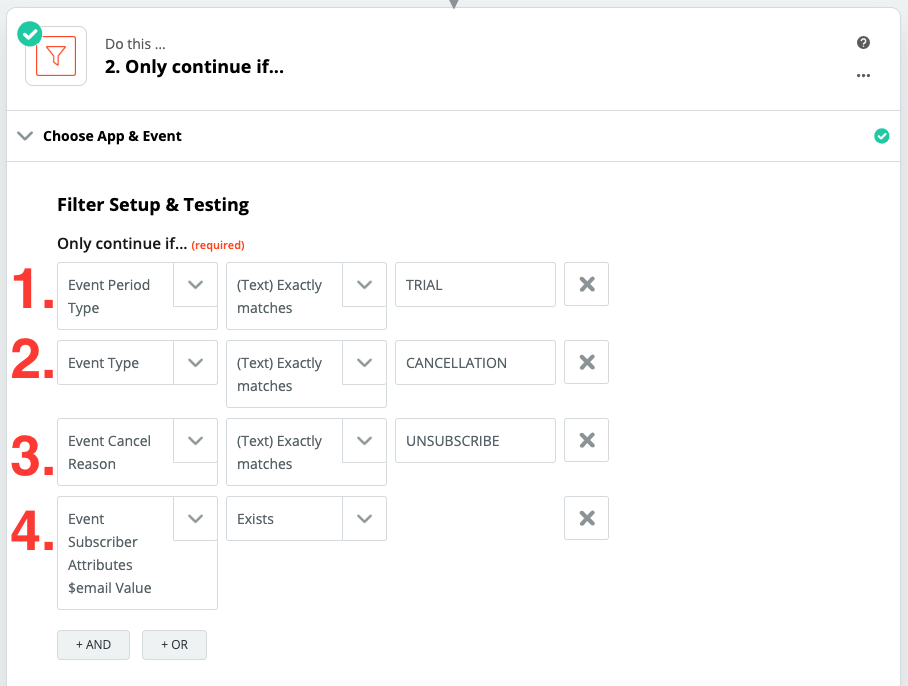
We will add a Filter step in Zapier to continue if events meet specific criteria. Below is a screenshot of the filters and we’ll describe them one-by-one:
Documentation for every event type and subscription lifecycle event is available in our Webhooks guide.
Event Period Type = TRIAL: We could send a cancellation survey to any user that cancels, but in this tutorial, we’re only interested in feedback from users that canceled during the free trial with hopes of discovering ways to increase our conversion rate.
Event Type = CANCELLATION: Only trigger the survey after a cancellation.
Event Cancel Reason = UNSUBSCRIBE: We don’t want to email users if the cancellation was due to a billing issue. We could email them a reminder to update their credit card instead.
$email Attribute Exists: Make sure we have the email attribute saved for the user that triggered the webhook.
Pro Tip: If you want to have multiple Zapier automations triggering off of the same RevenueCat webhooks, check out their guide on Triggering Multiple Webhooks at Once.
4. Send the email
Now that we’ve filtered events, we can send them the email with a survey link. Zapier has a built-in app for sending emails, but you can also use a service like Sendgrid or Mandrill for higher throughput.
Below is a screenshot of the built-in Zapier email app and the values we’ve used:
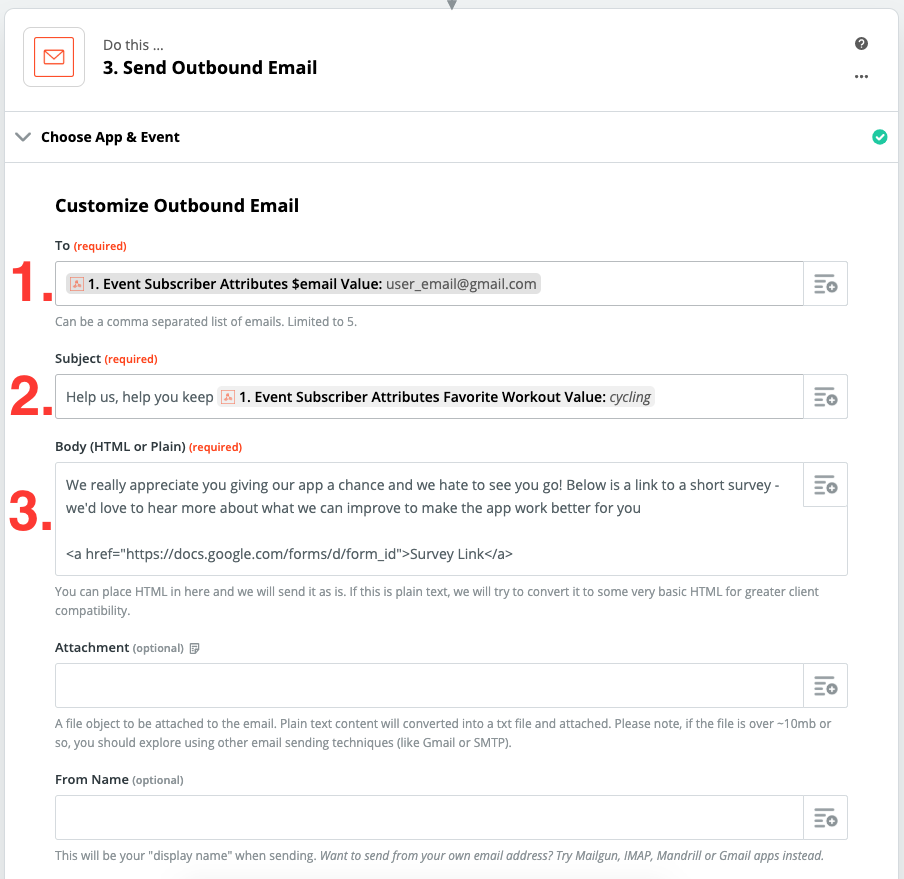
- To field – use the email attribute collected from our app.
- Subject field – add some personalization since we saved the user’s favorite workout. Ideally, this personalized touch gets more people opening our email and completing the survey.
- The Body – this is where we paste in the email in plain text or HTML. For this example, we’re keeping it simple with mostly plain text since we want our email to feel more like a personal note than a shiny marketing flyer. We’ve set the survey up as a Google Form. This way, responses will be tracked in a Google sheet, and we get email notifications for each completed survey.
5. (Optional) Add a new subscriber attribute for tracking
At this point, our automation is ready to go live. As an optional step, we can keep track of users who received the survey.
To do this, we’re going to add another Webhooks by Zapier step. This step will POSTs data instead of listening for requests.
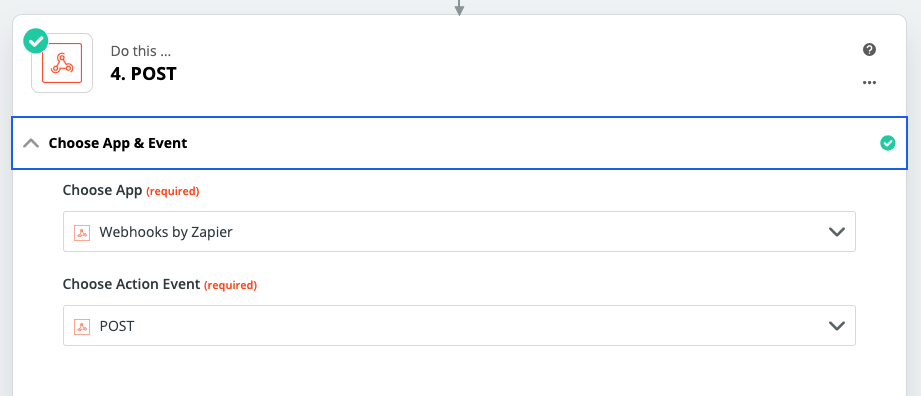
Next, we have to configure the POST to add a new attribute to the current user through the RevenueCat REST API. You can find the full documentation for this endpoint in the RevenueCat docs and we’ll describe how we’ve set this up step-by-step below:
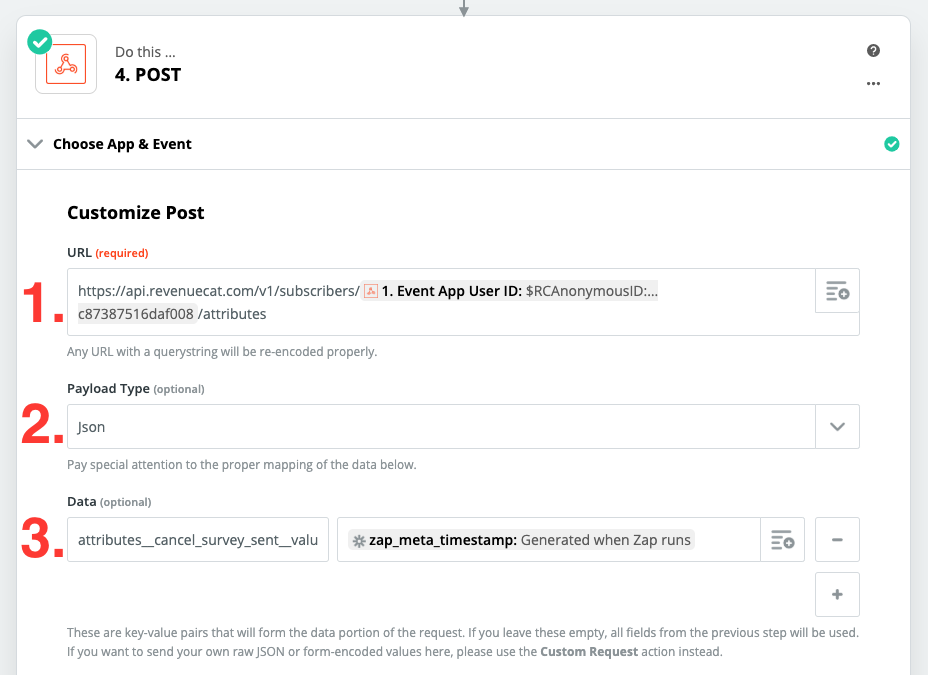
- The URL that we need to POST to is https://api.revenuecat.com/v1/subscribers/<app_user_id>/attributes</app_user_id>, where <app_user_id> is dynamically selected from the original webhook </app_user_id>Event App User ID value.
- Set the Payload Type to JSON – this should be the default.
- For data, Zapier allows you to use double underscores (__) to define nested dictionaries which is what we need to do here. We will set the current server timestamp as the value, so we know when the survey was sent. Thankfully, Zapier has a built-in timestamp variable to define this. Below is the JSON we want to send:
1{
2	"attributes" : {
3		"cancel_survey_sent" : {
4			"value" : {{zap_meta_timestamp}}
5		}
6	}
7}
The flattened out Zapier format that this translates to is:
Data: attributes__cancel_survey_sent__value
Value: {{zap_meta_timestamp}}
Finally, we need an Authorization header with “Bearer <revenuecat_api_key>” to properly authenticate with RevenueCat, as well as a Content-Type header set to application/json.</revenuecat_api_key>

That’s it! Now we can enable our automation, and it will start running right away. The cancellation survey is sent via email whenever someone unsubscribes from a trial. We can determine from the RevenueCat dashboard, REST API, or webhooks which users received the survey!
Where to go from here?
I hope this gives you some inspiration for the types of things that are possible with Subscriber Attributes. You could easily extend this example to engage with users at other critical points in your app.
If you’re using Subscriber Attributes, we’d love to hear about what you’re building on our Community or Twitter. As always, we are available to help you in any way we can, so don’t be shy about reaching out.
For more updates, tips, and tricks, follow us on Twitter!
In-App Subscriptions Made Easy
See why thousands of the world's tops apps use RevenueCat to power in-app purchases, analyze subscription data, and grow revenue on iOS, Android, and the web.